It took me a few minutes to figure it out so I thought I’d share how it’s done.
- Open a web browser to https://Portal.MicrosoftOnline.com.
- Log in to your Office 365 with an account that has the necessary administrative credentials.
- After logging in, click the Admin dropdown in the upper right corner and select Exchange. (See Fig. 1 below).

Fig 1. – Admin Dropdown
- Select mail flow from the left hand column as shown in Fig. 2.
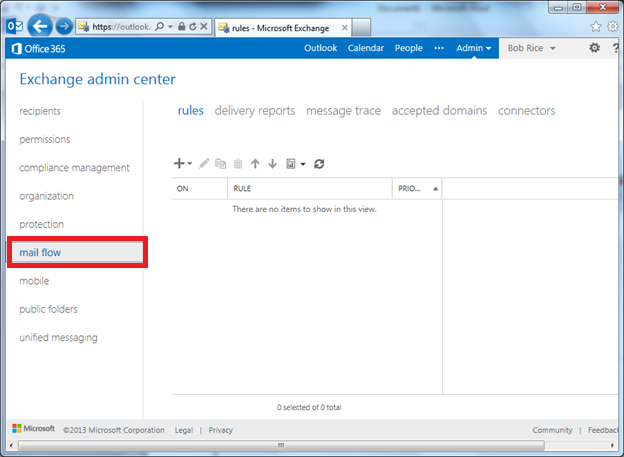 Fig. 2 Mail Flow Admin
- in the resulting screen, shown in Fig. 3 ensure that rules is highlighted fromt he options across the top of the admin center. Click the "+" and select "Bypass spam filtering" from the resulting drop down.
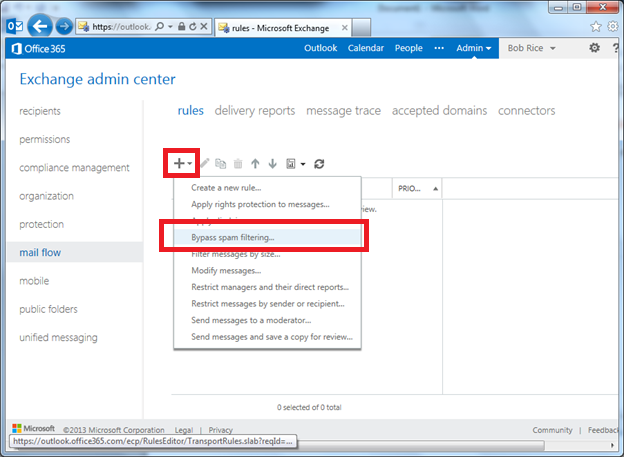
Fig 3. – Bypass Spam Filtering
- A new rule window (shown in Fig. 4) will pop-up. Specify a name for your rule. As shown below, I am using the generic name “Spam Whitelist” since I envision using this list to allow delivery from multiple different domains eventually.
- In the Apply this rule if… dropdown, select “The sender…” which will cascade further selection options. From that resulting menu, select domain is. (The example that I’m outlining here is to whitelist an entire domain, but take note of the other options available in this menu if you’d prefer to do a different or more granular type of whitelisting).
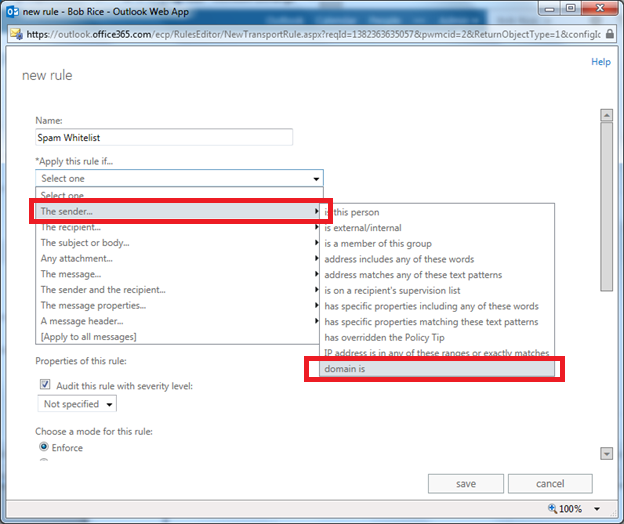
Fig 4. – New Rule
- The specify domain box will present itself as shown in Fig. 5. In that window, type the domain you wish to whitelist and then click the “+” sign. (You can add multiple domains to this list if you wish.)
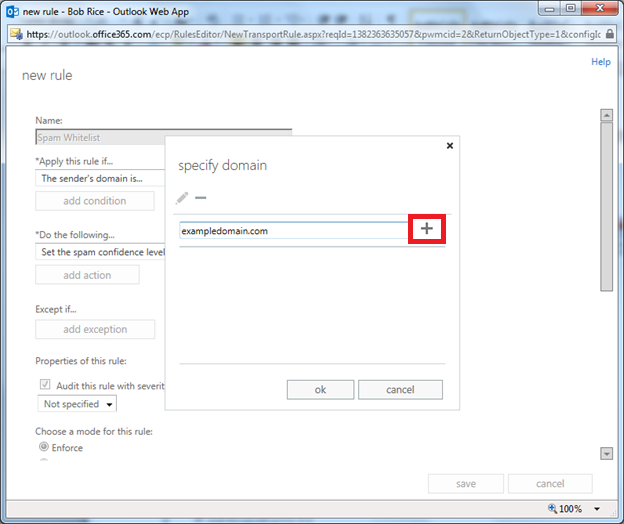
Fig 5. – Specify Domain
- Fig. 6 shows what’ the specify domain box should look like if you’ve added the domain(s) correctly.
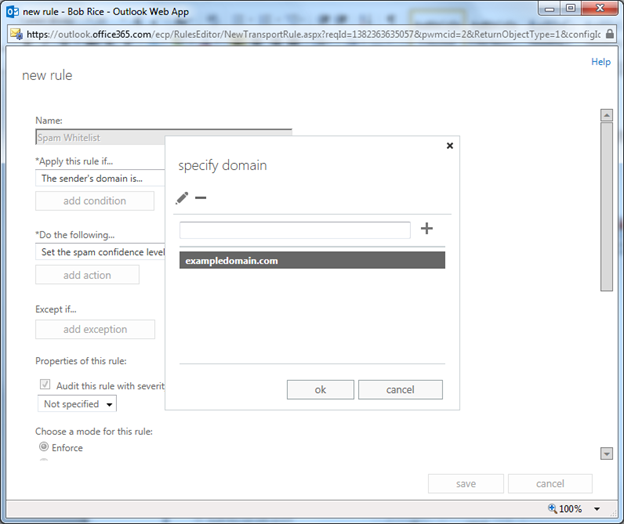
Fig 6. – Specify Domain – Finished
- At this point, you are done. You can simply click save and the whitelisting rule will go into effect.
- If you wish, you can review how the rule is modifying the message properties to bypass the spam filter, however since “bypass spam filtering” was already specified earlier (Fig. 3), the specific configurations required to bypass filtering are already complete.
- For the curious, Figs. 7 and 8 below show the details of this spam bypass policy.

Fig 7 - Set SPL
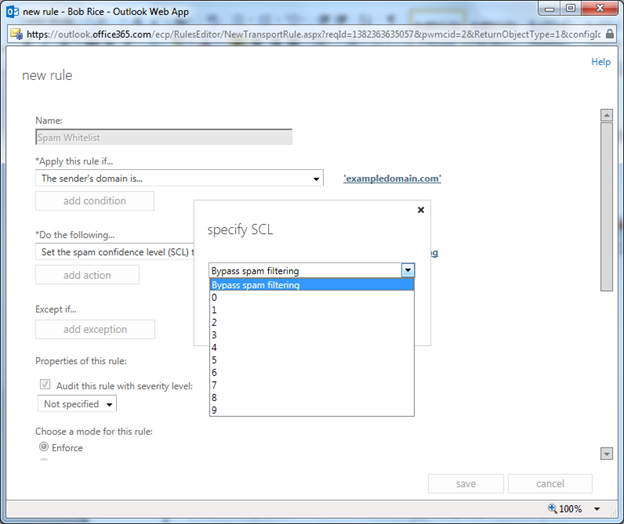
Fig 8 – Bypass Spam Filtering
- Fig. 9 shows the completed rule in its final/enabled state in the Exchange admin center. Simply return to this part of the console to adjust this ruleset, disable/enable it, or build other similar rules if you need some sort of customized email routing.
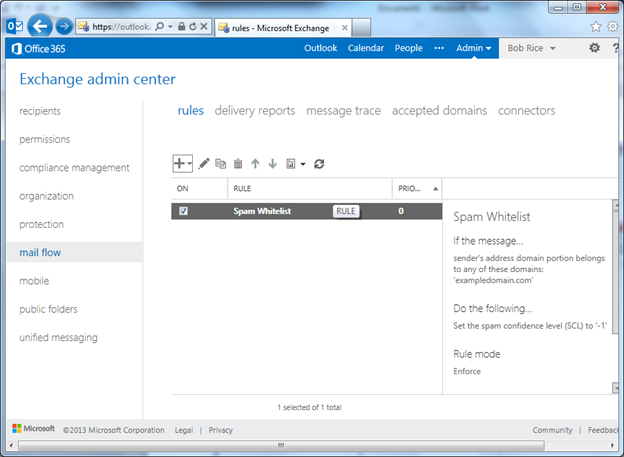
Fig 9. – Completed Rule
While the process to implement a spam whitelist inside of Office 365 has somewhat changed in the last year, the learning curve should be relatively minimal since the underlying technology is still familiar. This consolidated administration console is a nice step in the right direction in terms of centralizing all of the administration for its cloud platforms, and I’ll continue posting guides like this one as I uncover common admin tasks that have been slightly adjusted.